
If your interior door is sagging or won’t latch properly, you likely need a door hinge repair to fix the stripped screw holes that are causing the problem. A door that scrapes the floor or refuses to close is more than an annoyance: it can damage flooring, weaken the frame, and make your home feel neglected. The good news is that this is a repair most homeowners can handle in an afternoon, and the fix can last for a decade or more when done correctly. This guide walks you through the professional approach to door hinge repair, tailored specifically for the types of doors and jambs found in Canadian homes. Whether you are dealing with a hollow-core interior door in a 1990s condo, a solid wood door in a character home, or the particleboard jambs common in newer construction, you will find the right method here. By the end, you will understand why the popular toothpick trick usually fails and how a simple wooden dowel can restore your door to like-new condition.
Table of Contents
-
Why Your Door Hinge Screws Keep Stripping (And Why the Toothpick Trick Fails)
-
The Professional’s Choice: The Dowel Method for a Permanent Fix
-
Special Cases: Repairing Particleboard, MDF, and Metal Door Frames
Why Your Door Hinge Screws Keep Stripping (And Why the Toothpick Trick Fails)
Stripped hinge screw holes happen for a handful of predictable reasons. The wood fibres inside the jamb, or sometimes the door itself, get chewed away by the screw threads over time. This damage often starts with over-tightening during installation. A drill or impact driver set too high can spin a screw past its natural stopping point, shredding the wood around it in seconds. Using the wrong screw size is another culprit: a screw that is too short grabs only a thin layer of material, while one that is too thin cannot fill the existing hole properly. Repeated stress on the door accelerates the problem. A child swinging from the handle, a door that gets slammed regularly, or even years of normal use can gradually loosen screws until the holes are wallowed out and useless.
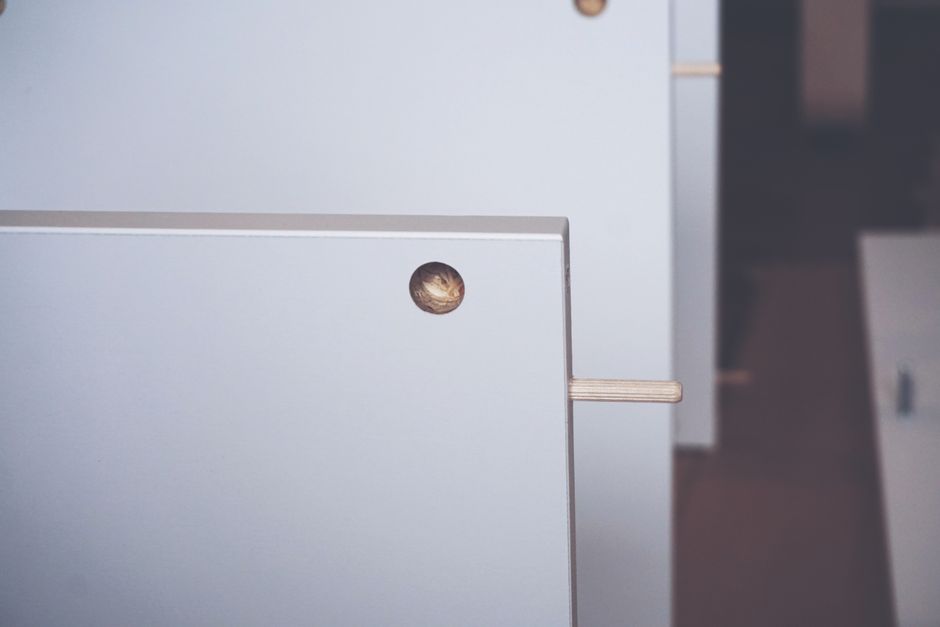
The toothpick and wood glue method is probably the most widely shared quick fix on the internet, and you have likely heard about it from a neighbour or a well-meaning relative. The idea is simple: dip a few wooden toothpicks in glue, jam them into the stripped hole, let the glue dry, and then drive the screw back in. On the surface, it makes sense. You are adding wood back into the hole. In practice, this method rarely holds up for more than a few months. Toothpicks are thin, brittle, and do not provide enough solid wood mass for the screw threads to bite into. The glue bond is uneven because the toothpicks leave gaps and air pockets. One Instructables author who documented their door hinge repair noted that they tried the toothpick method first and found it “did not work well,” which led them to develop a more reliable dowel-based approach. That experience is common. The toothpick fix might get you through a weekend, but it is not a permanent solution.
Canadian homes present an additional challenge. Many interior doors installed in the last forty years are hollow-core, meaning they have a thin veneer skin over a honeycomb cardboard interior. The solid wood around the hinge cutout is minimal. Even worse, modern door jambs are frequently made from particleboard or medium-density fibreboard (MDF) rather than solid lumber. These engineered materials crumble differently than real wood. When a screw strips out of particleboard, the material disintegrates into fine dust and small chunks, leaving a crater that toothpicks cannot fill effectively. The commercial market has responded to this widespread frustration: a search on Amazon.ca for “door hinge repair kit” returns over 50,000 results. That staggering number tells you how many people are dealing with this exact problem. But many of those kits are little more than metal plates and short screws that address the symptom rather than the cause. A proper dowel repair costs under two dollars and outperforms most packaged solutions.
The Professional’s Choice: The Dowel Method for a Permanent Fix
The dowel method is the standard repair used by experienced carpenters and handymen because it restores the jamb to a condition that is functionally identical to new solid wood. Instead of filling the stripped hole with scraps, you drill out the damaged area entirely and replace it with a glued-in hardwood dowel. Once the glue cures, you drill a fresh pilot hole and drive the screw into brand-new material. The result is a repair that can easily last ten years or more under normal use.
What You’ll Need (Tools and Materials)
Gathering the right materials before you start makes the job smoother. For this repair, you need a 3/8-inch poplar dowel, which comes in 48-inch lengths and costs under two dollars at Home Depot or Rona. Poplar is ideal because it is a stable hardwood that takes screws well without splitting. You also need a 3/8-inch Forstner bit. A Forstner bit cuts a flat-bottomed, clean-sided hole, which is far superior to the rough hole a standard twist bit produces. This matters especially for hollow-core doors, where a ragged hole edge can catch the veneer and cause tear-out. A cordless drill is fine for this work; you do not need a drill press. For glue, choose a quality wood glue like Titebond or Lepage’s. Both are widely available across Canada. The manufacturer recommends a full 24-hour cure time before stressing the joint, so plan your repair around that waiting period. You will also need a utility knife or sharp chisel to trim the dowel flush, sandpaper for smoothing, and a screwdriver or drill bit sized appropriately for pilot holes. Keep the original hinge screws handy, or purchase replacements of the same size. If the original screws were short, consider going slightly longer to get a better bite into the new dowel material.
Step-by-Step Repair Process

Start by removing the hinge from the door jamb. Leave the hinge attached to the door itself if possible; this saves you from having to realign the door completely during reassembly. Unscrew the jamb-side leaf and set the screws aside. If the door wants to shift, wedge a shim or folded cardboard underneath to hold it in position.
The next step is drilling out the stripped holes. Chuck your 3/8-inch Forstner bit into the drill and centre it carefully over the first damaged hole. Drill straight in, keeping the bit perpendicular to the jamb surface. For a solid wood jamb, you can drill about an inch deep, which gives the dowel plenty of material to anchor into. For a hollow-core door, this step requires extra caution. Drill only deep enough to clear the damaged wood, roughly one inch to an inch and a half. If you drill too far, you will punch through into the door’s hollow internal cavity. That cavity is filled with nothing but air and cardboard webbing, and there is no way to retrieve a dowel that falls inside.
Cut a segment of dowel slightly longer than the depth of the hole you just drilled. A quarter-inch extra is plenty. Apply wood glue liberally to the dowel and to the inside of the hole. Tap the dowel into place with a hammer. It should fit snugly; if it is loose, you need a larger dowel or a tighter hole. This is where the warning for hollow-core doors becomes critical: do not push the dowel too far in. If it slips past the solid wood edge and into the cavity, it is gone for good. Stop tapping as soon as the dowel bottoms out in the hole.
Now comes the hardest part of the entire repair: waiting. The glue manufacturer specifies a full 24-hour cure time before the joint can handle stress. Rushing this step is the single most common reason dowel repairs fail. If you reattach the hinge after only a few hours, the glue may not have developed full strength, and the screw can pull the dowel right back out. The Instructables author who popularized this method suggested listening to Tom Petty’s “The Waiting” to pass the time, and that is as good a recommendation as any. Use the waiting period to check the other hinges on the door for early signs of loosening.
After 24 hours, trim the protruding dowel flush with the jamb surface. A sharp utility knife works well for this, though a chisel gives a cleaner cut. Score around the dowel first to avoid tearing the surrounding wood or paint, then pare it down until it is flat. Sand the area smooth if needed. The repair should be nearly invisible once the hinge is back in place.
The final step is drilling pilot holes and reattaching the hinge. Hold the hinge leaf in position and mark the centre of each screw hole with a pencil or awl. Drill a pilot hole into the centre of each dowel plug using a bit that is slightly smaller than the screw’s shank. The pilot hole prevents the screw from splitting the new wood and makes driving the screw much easier. Align the hinge, insert the screws, and tighten them by hand or with a drill set to a low clutch. Stop as soon as the screw head sits flush with the hinge plate. Over-tightening at this stage will strip your brand-new repair, undoing all your work. Test the door swing and latch alignment. If everything moves freely and the latch catches cleanly, the repair is complete.
Special Cases: Repairing Particleboard, MDF, and Metal Door Frames
Not every door frame in Canada is made from solid wood. Newer homes, particularly those built in the last two decades, often use engineered materials for jambs, and some basements or commercial entries feature metal frames. These situations call for adjustments to the standard dowel method.
Particleboard and MDF Jambs (Common in Newer Canadian Homes)
Particleboard and MDF are dense, heavy materials made from compressed wood fibres and resin. They machine cleanly but are brittle. When a screw strips out, the material does not splinter like solid wood; it crumbles into gritty powder. The dowel method still works on these jambs, but you need to modify your technique. First, use a slower drill speed when running the Forstner bit. High speeds generate friction heat that can burn the resin in MDF, leaving a glazed, slippery hole surface that glue cannot bond to. A slow, steady speed cuts cleanly without overheating. Second, consider using a two-part epoxy instead of standard wood glue. Epoxy bonds better to the resin in MDF and fills the micro-gaps that wood glue might miss. Mix the epoxy according to the package instructions, coat the dowel and the hole, and insert the dowel as normal. The cure time for epoxy varies by product, so check the label. Finally, when you reassemble the hinge, use coarse-thread screws specifically designed for particleboard. These screws have deeper, more aggressive threads that grip the engineered material better than standard wood screws. Using the right screw from the start helps prevent future stripping.
Metal Door Frames (Commercial or Basement Entries)
Metal door frames present an entirely different challenge. Wood glue and dowels have no place here; they simply will not bond to steel. Stripped screw holes in a metal frame mean the threads inside the metal have been damaged or the hole has enlarged. The correct repair uses mechanical fasteners that create new threads. Self-tapping screws are the simplest option. These screws cut their own threads as they are driven in, and choosing a size one gauge larger than the original often solves the problem. For more severely damaged holes, a rivet nut, also called a jack nut, provides a permanent threaded insert. You drill the stripped hole out to the size specified by the rivet nut manufacturer, insert the nut, and use a rivet nut tool to compress it. The tool collapses the nut body behind the metal, creating a strong, threaded anchor point. Rivet nut tools are available at Canadian Tire and Princess Auto, and they are worth the investment if you have multiple metal-frame doors in a commercial space or older basement suite. Do not attempt to use wood-based repair methods on metal frames; they will fail immediately.
When to Replace the Hinge Instead of Repairing the Holes
Sometimes the stripped screw holes are not the real problem. If the hinge itself is damaged, no amount of hole repair will fix a door that drags or will not close. Inspect the hinges carefully before committing to the dowel method. A bent hinge leaf is usually obvious: the metal will have a visible curve or twist that prevents the two leaves from sitting flat against each other. Rusted hinges, common in bathrooms or exterior doors exposed to moisture, can seize up or develop enough surface roughness to throw off the door alignment. Worn hinge pins are another culprit. Over time, the pin can wear down or bend, creating slop in the hinge knuckles that lets the door sag even when the screws are tight.
A quick test for a worn hinge pin is to open the door partway and lift the handle. If you feel vertical play and see the hinge leaves shift relative to each other, the pin or the knuckles are worn. In some cases, you can tap the pin back into place with a hammer and nail punch as a temporary fix, but if the pin keeps working its way upward, replacement is the only lasting solution. When you replace a hinge, match the size and finish to your existing hardware. Standard interior door hinges in Canada are 3.5 inches or 4 inches, measured vertically. Canadian Tire and Home Hardware stock common sizes in brass, nickel, and oil-rubbed bronze finishes. Replacing a hinge is straightforward: unscrew the old one, screw in the new one, and check the door alignment. If the new hinge does not sit flush because the mortise is a different depth, you may need to shim behind it or chisel the mortise slightly deeper.
How to Prevent Stripped Hinge Screws in the Future
Preventing stripped screw holes is far easier than repairing them. The most important habit is using the right screw for the job. Drywall screws are brittle and have thin shanks with fine threads designed for gypsum, not wood. They snap easily and do not hold well in door jambs. Use number 8 or number 9 wood screws with coarse threads for interior door hinges. The coarser thread pattern bites deeper into wood fibres and resists pulling out.
Always drill a pilot hole, even when driving a screw into a brand-new dowel or fresh jamb. A pilot hole guides the screw straight, prevents the wood from splitting, and reduces the torque needed to drive the screw. Less torque means less stress on the wood threads. The pilot hole diameter should match the screw’s shank minus the threads; hold the drill bit and screw up to the light together, and choose a bit that is slightly smaller than the screw’s full diameter.
Over-tightening is the number one cause of stripped holes. A screw needs to be snug, not cranked down with maximum force. If you are using a drill or impact driver, set the clutch to a low number and finish tightening by hand with a screwdriver. You will feel the screw seat firmly, and that is where you stop. For heavy exterior doors, consider a trick used by Canadian locksmiths: replace one or two of the short hinge screws with 3-inch screws that reach past the jamb and into the structural stud behind it. This anchors the hinge to the house framing, adding both security and long-term stability. The longer screw distributes the door’s weight across more material and dramatically reduces the chance of stripping.
Frequently Asked Questions About Door Hinge Repair
Can you fix stripped hinge holes without removing the door? Yes, but it is more awkward. A right-angle drill attachment or a flexible shaft bit holder lets you drill out the stripped holes while the door hangs. Alternatively, remove the hinge pins rather than the entire hinge. With the pins out, the door comes free and the hinge leaves stay on the jamb, giving you clear access to the screw holes without the weight of the door complicating things.
How long does a dowel repair last compared to a commercial kit? A properly executed dowel repair can last ten years or longer. The glued-in hardwood dowel creates a solid wood anchor that is essentially as strong as the original jamb material. Commercial metal repair plates, the kind that screw over the damaged area, are faster to install but rely on small screws driven into the remaining good wood around the stripped hole. Over time, those screws can work loose as the plate flexes under the door’s weight. Dowels are generally the more durable long-term solution.
Is the toothpick method ever okay? Only as a temporary patch. If you are renting and need to fix a loose hinge before a move-out inspection, toothpicks and glue might get you through. For a home you own and live in, invest the extra hour and do the dowel repair. You will not want to revisit the same door in six months.
What if my door is solid wood? The dowel method works even better on solid wood doors and jambs because the material is denser and more forgiving. You can drill deeper holes and use longer dowel segments for maximum screw grip. Solid wood also holds glue exceptionally well, so the bond strength is higher than in engineered materials.
Final Checklist for a Successful Door Hinge Repair
Before you call the job done, run through this checklist. Confirm that you correctly identified stripped screw holes as the problem, not a bent hinge or a worn pin. Verify that you chose the dowel method for a permanent fix, or epoxy if you are working with MDF. Check that you used a Forstner bit for clean, precise holes, especially on hollow-core doors. Make sure you allowed the full 24-hour glue cure time before reassembling the hinge. Confirm that you drilled pilot holes into the new dowels before driving the screws. Finally, test the door swing and latch alignment. The door should open and close smoothly, and the latch should engage without lifting or forcing the door.
If the door still sags after a proper screw repair, the problem may be more extensive, such as a shifted frame or structural settling. In those cases, a professional assessment is the safest next step. For homeowners who would rather hand the job off, experienced help is available. Avoiding common mistakes during any door project saves time and frustration, and a solid repair keeps your home functioning the way it should.
